The question always pops up in your head what do you do if your Wi-Fi connection is as slow as the tortoise? The best solution you would prefer is to change the Wi-Fi channel of your router and fix the problem. But how do you do it?
Changing the settings of your router’s channel is not like changing the channels on TV. However, the process is the same. You have to choose a channel and transfer data over that channel using Wi-Fi.
The routers that are set up the first time are set to Auto. Certainly, this is also the case for your neighbour’s router’s settings. So the chances are higher that the channel used by your router and your neighbor may be the same. And this results in slow internet because you and more users are sharing the same channel. To be precise, this causes interference between the Wi-Fi signals which results in
- slow internet takes longer time in reloading web pages.
- takes longer time in reloading web pages,
- buffering time of YouTube and DailyMotion videos increases.
- failure in sending important data and files.
So if you swap your Wi-Fi channel to another channel that no one’s using, you can improve your internet speed.
Now let’s jump into the steps to know how you can change the Wi-Fi channel of your router safely and enjoy your internet speed.
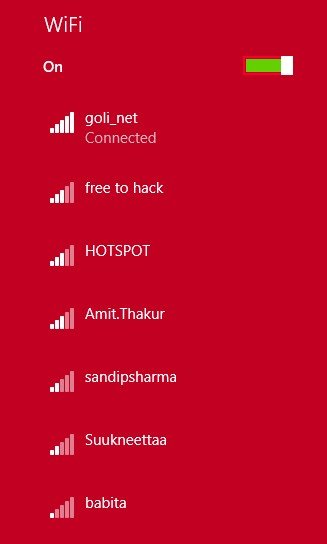

Step 1:
Before jumping into changing channels, you need to use software that scans your Wi-Fi signals near your device and locate the channels they are on. The software you can use is the inSSIDer utility. And if you start the process on an Android device, you can use the WiFi Analyser App.
Note: The most stable channels among the listed ones are 1,6 and 11, which means if you switch your Wi-Fi channels to these listed ones, the chances are high that your internet speed is not going to betray you most of the time.
Step 2:
You will observe different Wi-Fi signals around your device, represented by different colours and signal strengths. This will inform you if you are on strong or weak signal channels, help you decide which channel to choose, etc. It is better to choose a channel that is far from your neighbours.
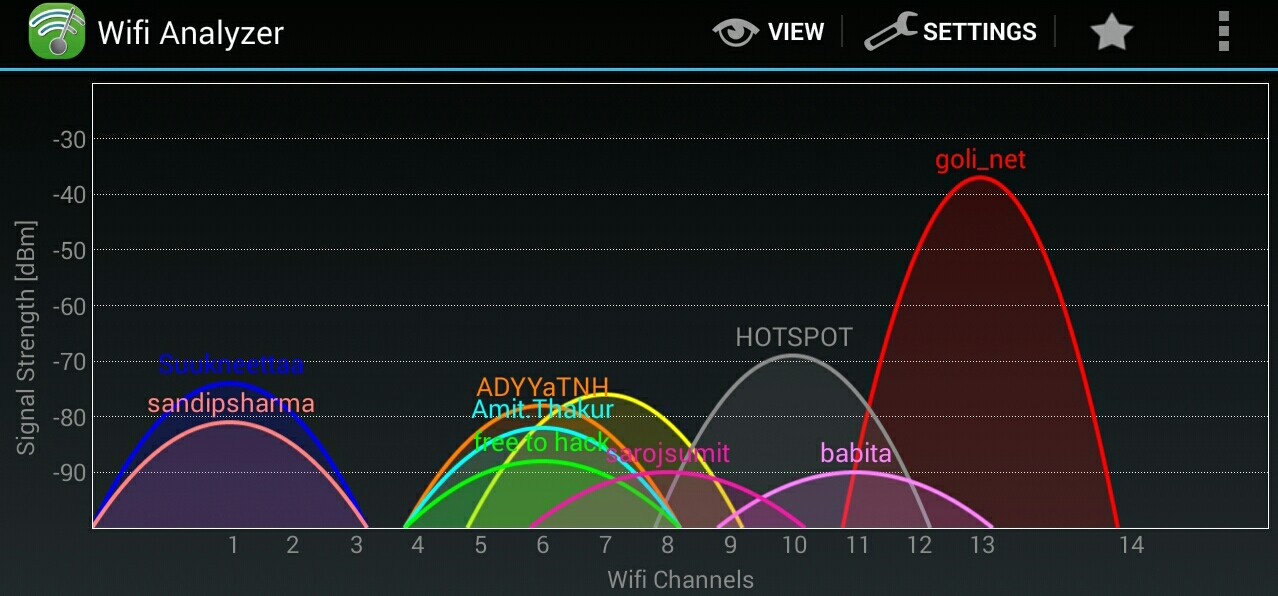

Step 3:
Now you need to access your router’s IP address from the browser. If you don’t know your router’s IP address, you can find it from Command Prompt. Normally, the address is 192.168.1.1, but the example here is the router of Digicom so the address here is 192.168.10.1.
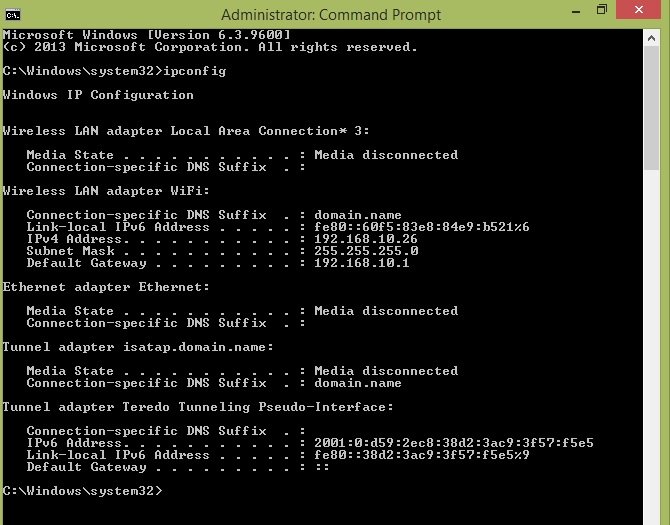

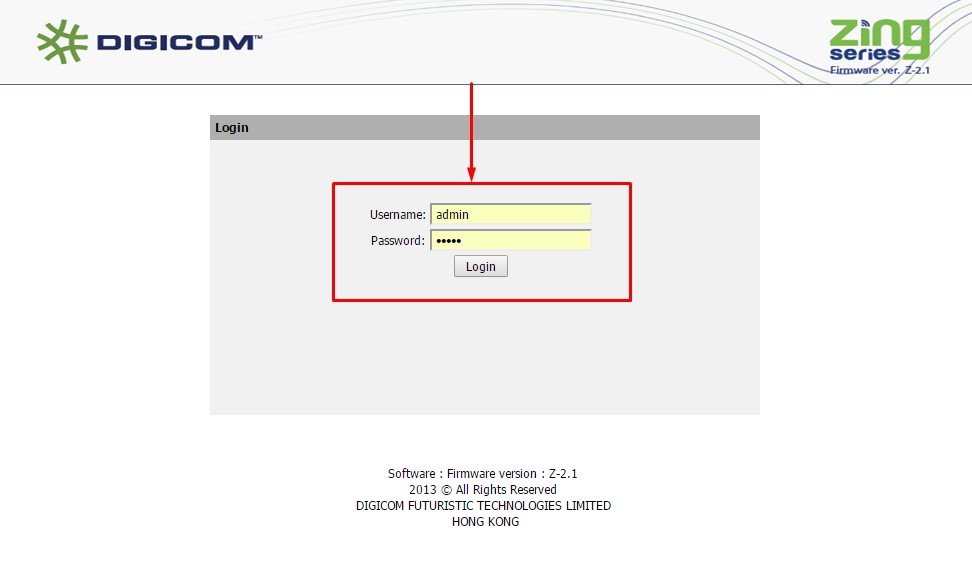

Step 4:
Since we are using the router of Digicom, go to the Wireless menu to change the channel of your Wi-Fi. There you will find the Channel tab just below the SSID tab.
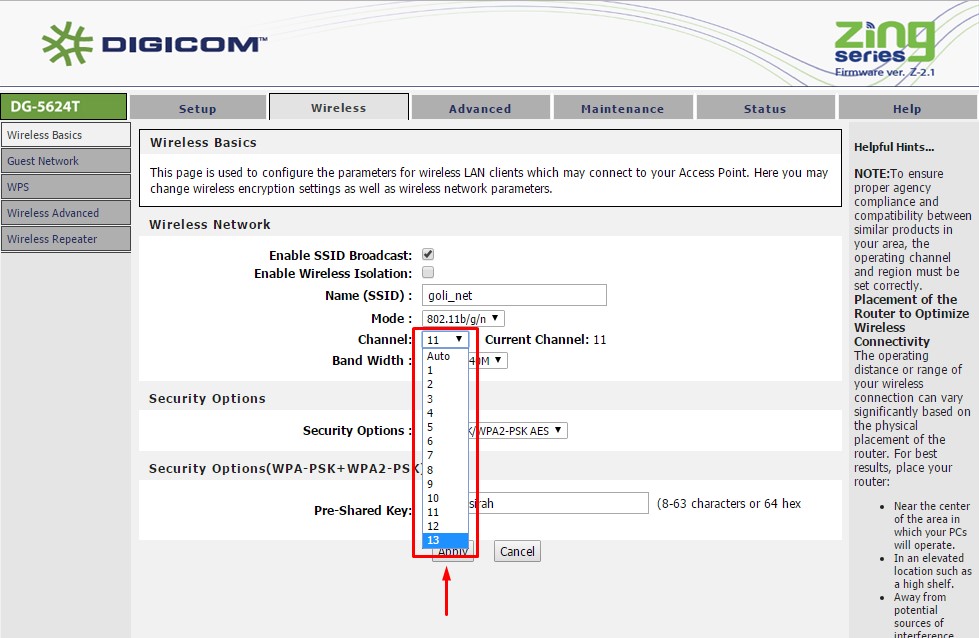

Then adjust the channel you found better for faster internet. And reboot the system to apply the changes.


